Epiphany / Regulator & ASA
Regulator & ASA
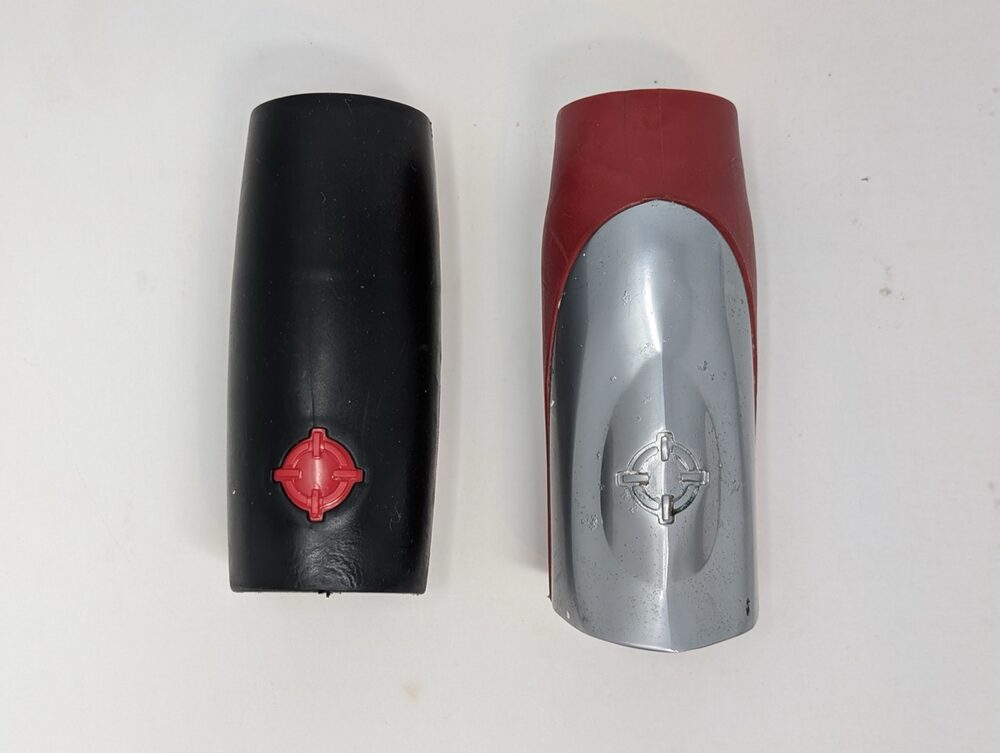
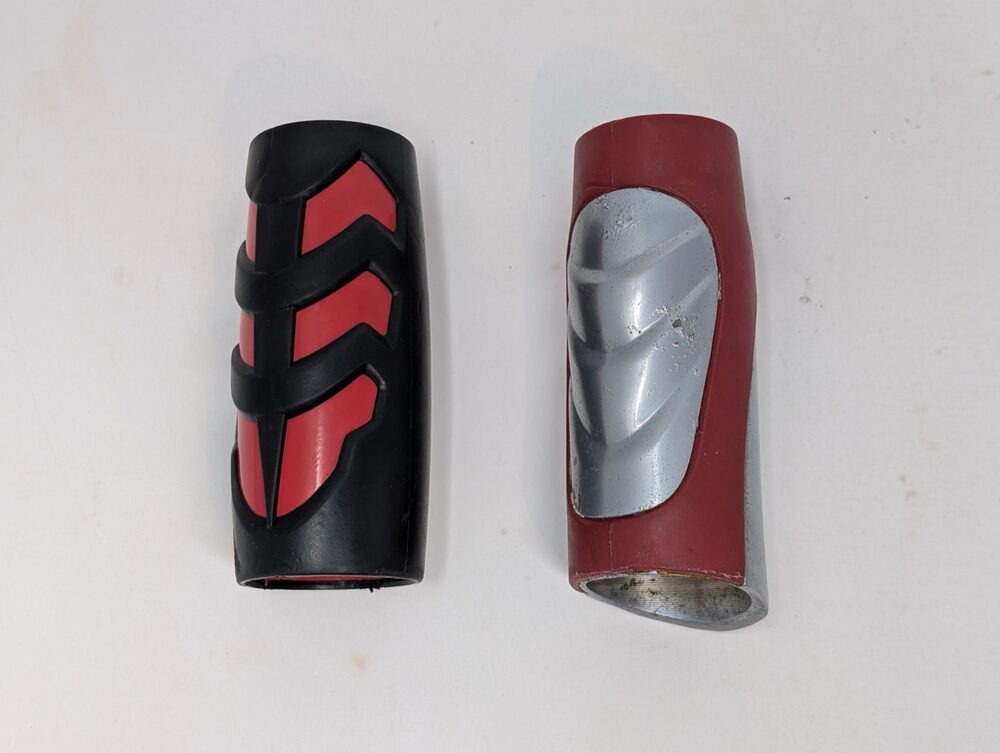
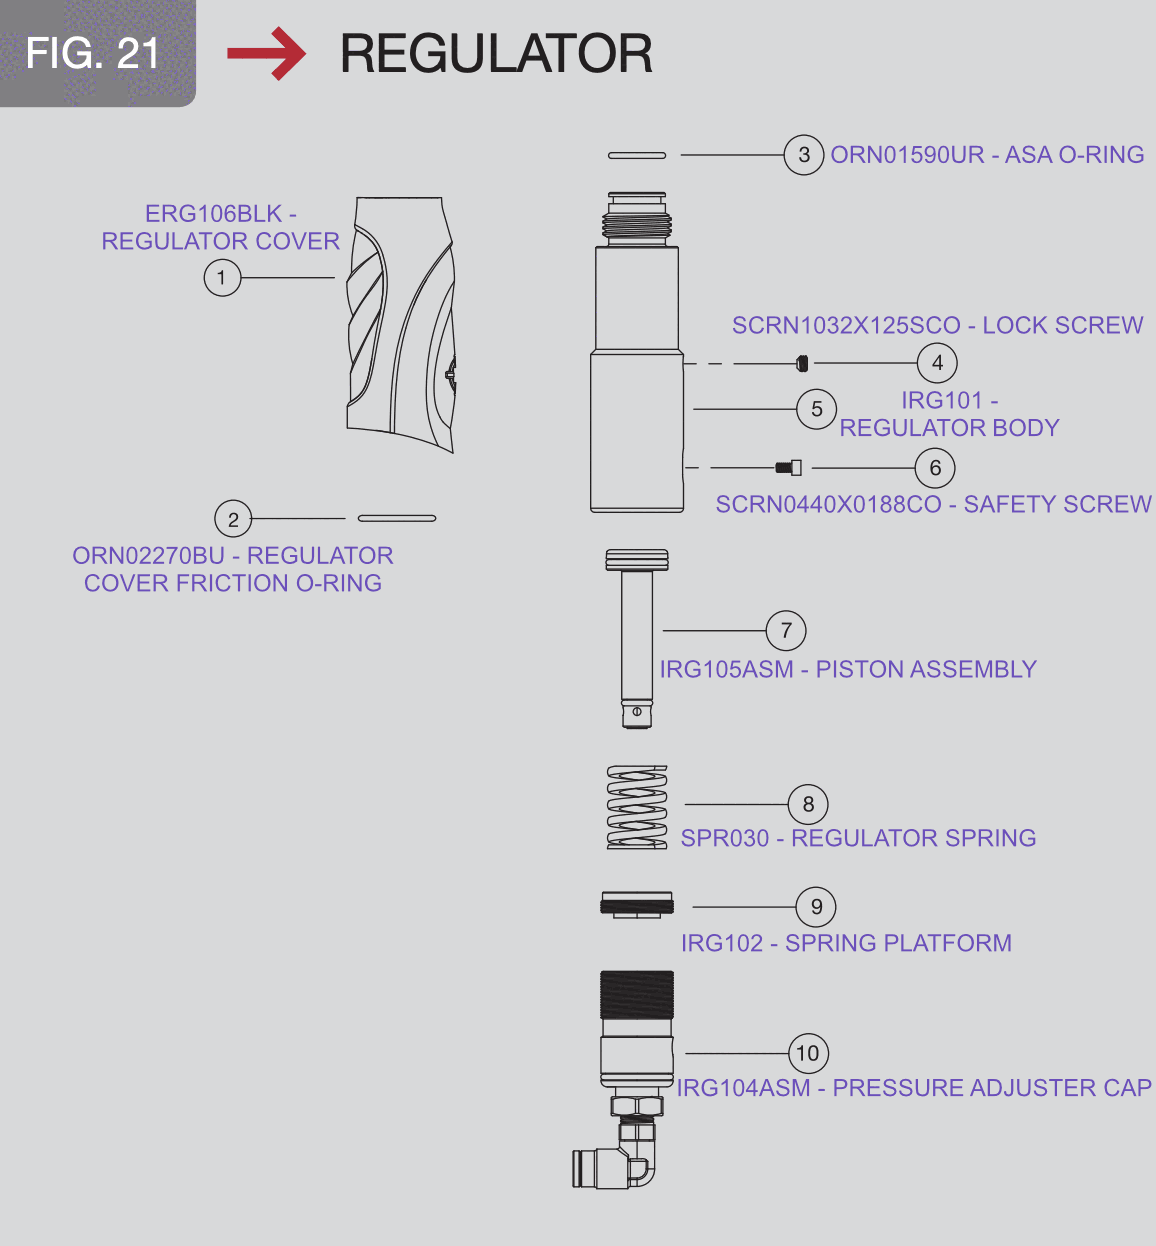
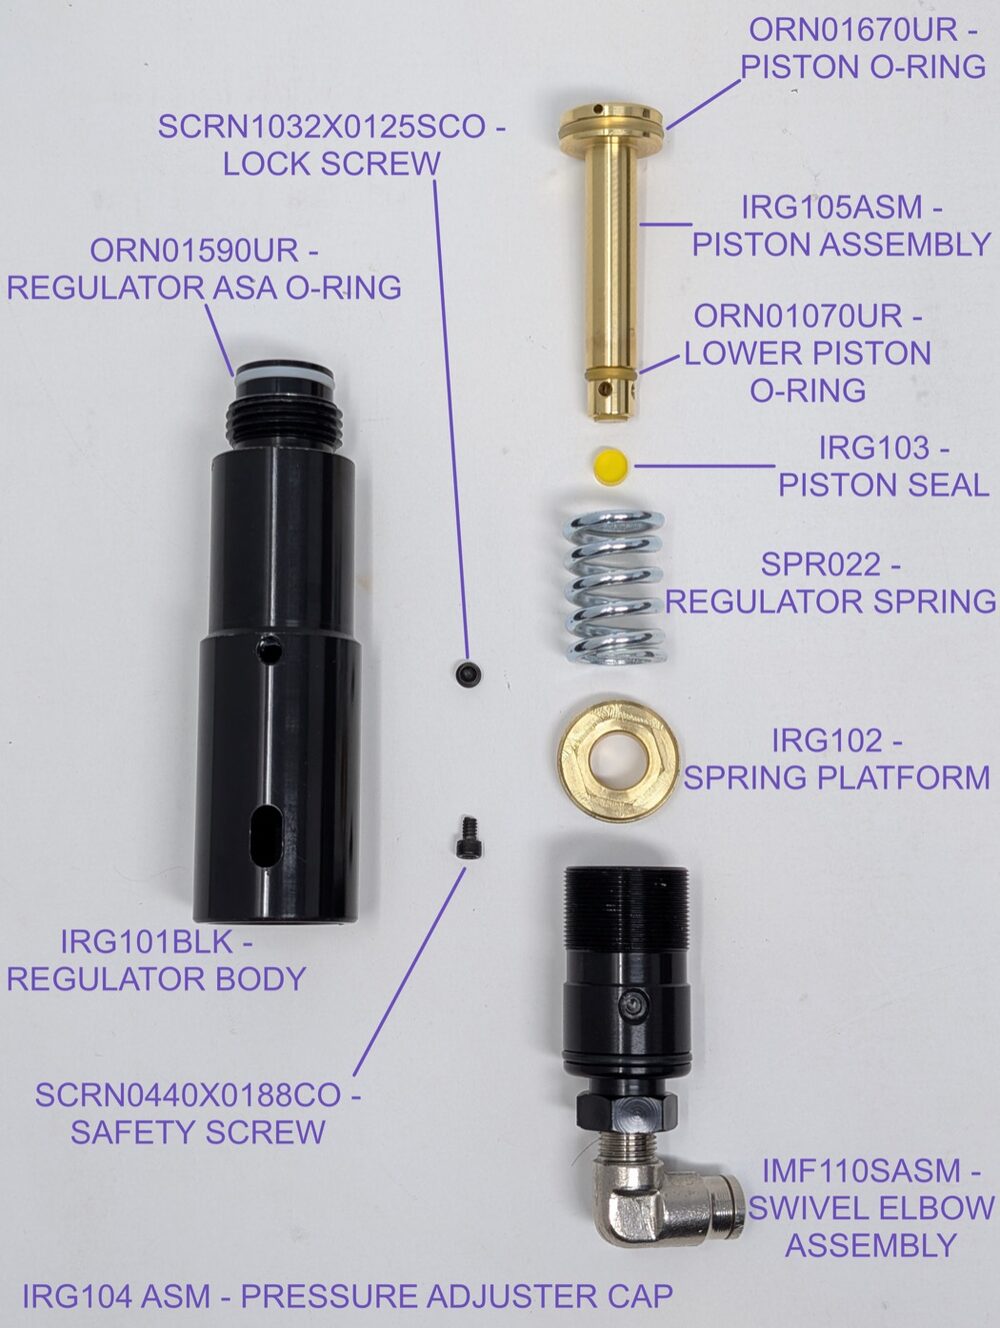
Per both manufacturer manuals' own "FIG. 21 REGULATOR" diagrams, the body, ASA o-ring, lock screw, safety screw, piston assembly, spring platform, and adjuster cap are the identical parts as the standard Ion's regulator. Three things are genuinely different: the regulator cover (a different, Epiphany-specific piece — its own sculpted shape with a panel insert, not a recolor of the Ion's grip), a friction o-ring that's an Epiphany-only addition (it keeps that cover from rotating around the regulator body — the Ion's grip doesn't need one), and the regulator spring itself, a different part likely rated for the Epiphany's higher operating pressure. It also attaches differently (a sleeve on the Epiphany's vertical ASA, rather than threading straight into the body), and regulates to 250–280 psi versus the standard Ion's ~180 psi.
What you'll need
- 3/32" hex key (safety screw, ASA mounting screw, solenoid bracket)
- 5/8" open-end or adjustable wrench (adjuster cap)
- 9/16" deep well socket and ratchet (spring platform)
- Molykote 33 Light lubricant, blue Loctite 242 (or clear nail polish) for the safety screw
- 70% isopropyl alcohol (an ultrasonic cleaner works well for a thorough pass), or an aircraft-safe electronics cleaner
- 15/16" socket, with an impact driver if you have one (only if removing the gauge — a crescent wrench works too, just with noticeably more manual effort)
Disassembly
- Remove the macroline hose from the regulator: push the collar on the 90° fitting in toward the fitting body to release its grip on the hose, then pull the macroline free. An o-ring inside the fitting is what actually seals the connection — the collar's only job is holding the hose engaged against it. Then unscrew the regulator from the vertical ASA.
- Remove and clean the metal filter screen between the regulator and vertical ASA.
- Slide the regulator body out of its sleeve (friction-fit with an o-ring).
- Turn the adjuster cap (as if adjusting velocity) until the safety screw is visible in its slot, then remove the safety screw with a 3/32" hex key.
- Unscrew the adjuster cap fully — turn it clockwise (left-hand threaded) with the 5/8" wrench.
- Remove the lock screw halfway up the regulator body (3/32" hex key), then unscrew the spring platform clockwise with the 9/16" deep well socket (also left-hand threaded — the hex faces are short, so keep steady pressure on the socket).
- The spring should come free on its own. The piston may need light pressure from a hex key through the top of the body — go gently, the brass piston scratches easily.
Cleaning and greasing
Clean all parts with isopropyl alcohol and inspect every o-ring plus the regulator seat (the clear part on the piston end) for damage. Lubricate the piston assembly's o-rings with Molykote 33 Light. Do not lubricate the regulator seat, the adjuster cap's o-ring, or the sleeve/sleeve o-ring — the sleeve specifically needs to stay dry or the regulator becomes very difficult to remove later.
Reassembly
- Place the spring on the piston assembly. With the ASA side down, slide both into the regulator body.
- Lower the spring platform in nut-side up and screw it in counter-clockwise with the deep well socket until fully seated — visible through the lock screw hole.
- Reinstall the lock screw.
- Screw the adjuster cap back in counter-clockwise until the safety screw slot aligns.
- Apply threadlocker to the safety screw and reinstall it. Confirm it's fully seated and the cap still turns freely.
- Place the sleeve o-ring in the sleeve, then the regulator, and reinstall into the vertical ASA.
- Reconnect the macroline.
- Re-chronograph and re-adjust velocity before use — any regulator service changes output pressure.
ASA
A completely different mounting style from the standard Ion's two-screw bolt-on ASA. The Epiphany's ASA slides into the bottom of the grip frame on a male dovetail rail (matching a female dovetail on the ASA itself), then gets clamped in place by a single 3/32" hex screw that threads downward through the bottom of the grip frame, accessible only from inside the frame once the grips are off. To remove it, open the grips, back the screw out, and slide the ASA free along the dovetail; to reinstall, slide it back in dovetail-first and tighten the screw. No o-ring or seal involved either way.
Gauge
Threaded into the front of the grip frame, where it meets the regulator. Remove it with a 15/16" socket, turning counter-clockwise — an impact driver makes quick work of it; a crescent wrench works too, but takes noticeably more manual effort to break free.
More than you want to tackle yourself? Check out the finished builds or get in touch to have your Ion serviced.