Ion 1.0 / Regulator & ASA
Regulator & ASA
This procedure is shared across the Ion platform lineup — the vertical regulator architecture and service approach is consistent across generations, though exact part numbers can vary by production run.
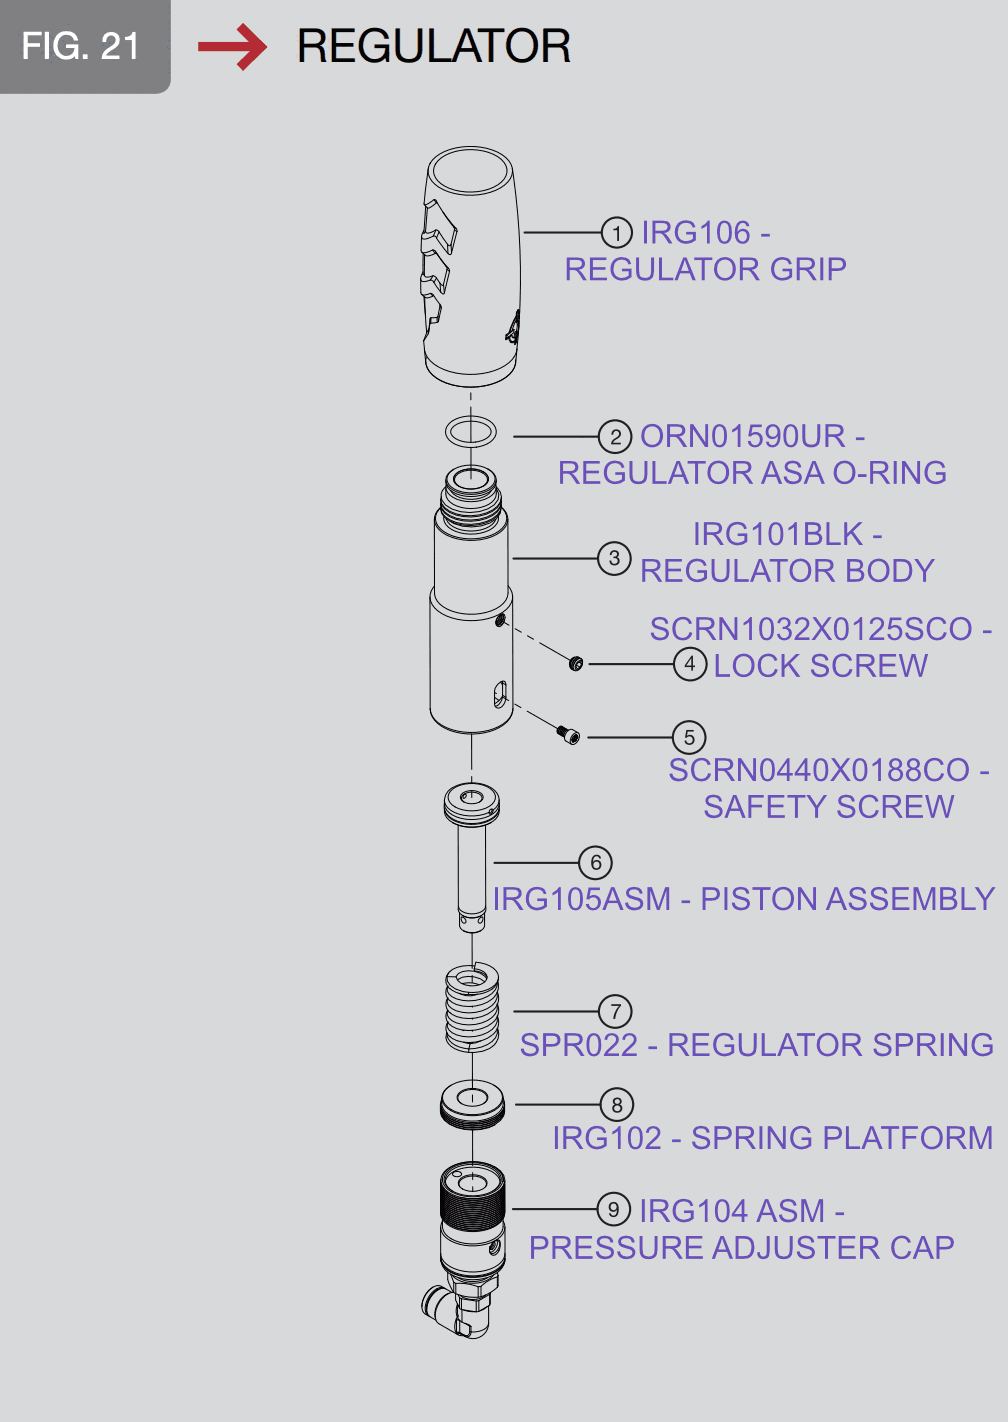
Diagram from the official Smart Parts Ion Operation and Maintenance Manual.
The Ion’s regulator drops tank pressure down to a stock factory setting around 180 psi before it reaches the firing assembly. It’s a fully rebuildable piston-and-spring design — worth knowing before you replace one outright, since most regulator problems are a cleaning/reseat job, not a parts failure.
Maintenance interval
Regulators don’t need attention nearly as often as the bolt or solenoid — Smart Parts’ own suggested interval is every 20,000–25,000 pressurized cycles, or roughly every 3–4 months of regular play. Check sooner if you notice pressure inconsistency.
What you’ll need
- 1/8” hex key
- 3/32” hex key (for the two set screws)
- 5/8” wrench (for the velocity adjuster)
- 9/16” deep well socket and ratchet (for the internal spring platform)
- Molykote 33 Light (formerly marketed as Dow Corning 33 / “Shocker Lube” / SL33K — same product, current name) — the same lubricant used for bolt/valve service. Avoid the Medium formula; it has more drag than these markers want.
- Loctite Threadlocker Blue (242) for the set screws on reassembly — clear nail polish works in a pinch if you don’t have threadlocker on hand
- 70% isopropyl alcohol (an ultrasonic cleaner works well for a thorough pass), or an aircraft-safe electronics cleaner
- 15/16” socket, with an impact driver if you have one (only if removing the gauge — a crescent wrench works too, just with noticeably more manual effort)
Disassembly
- Disconnect the black macroline hose running between the regulator and the ASA: push the collar on the 90° fitting in toward the fitting body to release its grip on the hose, then pull the macroline free. An o-ring inside the fitting is what actually seals the connection — the collar’s only job is holding the hose engaged against it, so once the collar is pushed back and held, the hose pulls straight out.
- Unthread the regulator counter-clockwise from the marker body. The body filter comes free with it — check it for debris or damage and set it aside. When you reinstall the regulator later, that filter needs to sit perfectly straight in the vertical adapter before you thread the regulator back in — if it’s cocked at all, the regulator will crush it and get stuck. It also has a top and bottom: the side with the flatter circumference faces down, toward the regulator. The filter is there to keep contamination out of the regulator and solenoid, not to hold pressure — an Ion runs fine without it if you’re troubleshooting whether it’s the cause of a seating problem, though it’s worth running normally for completeness.
- Remove the regulator grip from the bottom up.
- Remove both set screws on the regulator body with the 3/32” hex key: one on the outside, roughly halfway up; the other inside an oval-shaped hole near the bottom (you may need to rotate the velocity adjuster to line this one up with the slot).
- Turn the velocity adjuster clockwise with the 5/8” wrench until it comes completely free.
- Turn the internal spring platform clockwise with the 9/16” deep well socket until it releases — the regulator spring comes free with it.
- Push the piston/regulator seat out through the bottom of the body with the 1/8” hex key.
Cleaning and greasing
Wipe every part down with isopropyl alcohol (or run them through the ultrasonic cleaner) to fully degrease before inspecting or regreasing — old grease and debris hide flattened or swollen o-rings. Grease both o-rings on the piston assembly — but do not grease three specific surfaces, which all need to stay dry to seal properly: the regulator seat itself (the small seat at the end of the piston), the large o-ring around the velocity adjuster, and the o-ring at the top of the regulator.
Reassembly
- Push the piston/regulator seat back into the body, large end first, until it stops.
- Slip the spring over the piston end inside the body.
- Reinstall the spring platform, turning counter-clockwise until snug — correctly seated, you should be able to see brass through the set screw hole.
- Thread the velocity adjuster back in counter-clockwise until the lower set screw hole lines up with the oval slot.
- Reinstall both set screws snug with the 3/32” hex key, with a small dab of threadlocker on the velocity adjuster’s set screw threads. Don’t overtighten. Then turn the adjuster fully counter-clockwise until it stops — this returns the regulator to zero output pressure before you gas up.
- Slide the regulator grip back over the regulator body.
- Gas up and bring pressure up gradually: turn the adjuster clockwise in small increments, cycling the marker 5–10 shots between adjustments, working up toward stock pressure. Never let the marker exceed 300 fps at any point during this process.
Common failure: regulator seizure
Beyond a full rebuild, day-to-day seizing or pressure creep is usually a wear or contamination issue on the adjustment threads rather than a worn seal — a full clean and inspection during a rebuild is the fix. Nothing in the regulator gets fresh grease added beyond the two piston o-rings already covered above; don’t add lubricant anywhere else expecting it to prevent seizure.
If the gauge or internals were visibly damaged by a seizure rather than just needing a rebuild, that’s beyond a DIY fix — Smart Parts is no longer in business, so there’s no manufacturer warranty to fall back on. Your best bet is sourcing a used replacement regulator or gauge, or having it repaired.
ASA
The ASA (Air source adapter) is a separate piece from the regulator — it bolts to the bottom of the grip frame with two 1/8” hex screws and has no o-ring or seal of its own. There’s nothing to disassemble beyond removing those two screws.
Gauge
Threaded into the front of the grip frame, where it meets the regulator. Remove it with a 15/16” socket, turning counter-clockwise — an impact driver makes quick work of it; a crescent wrench works too, but takes noticeably more manual effort to break free.
Related
- Electronics — dwell and rate-of-fire settings
- Troubleshooting: leaks and inconsistent shooting
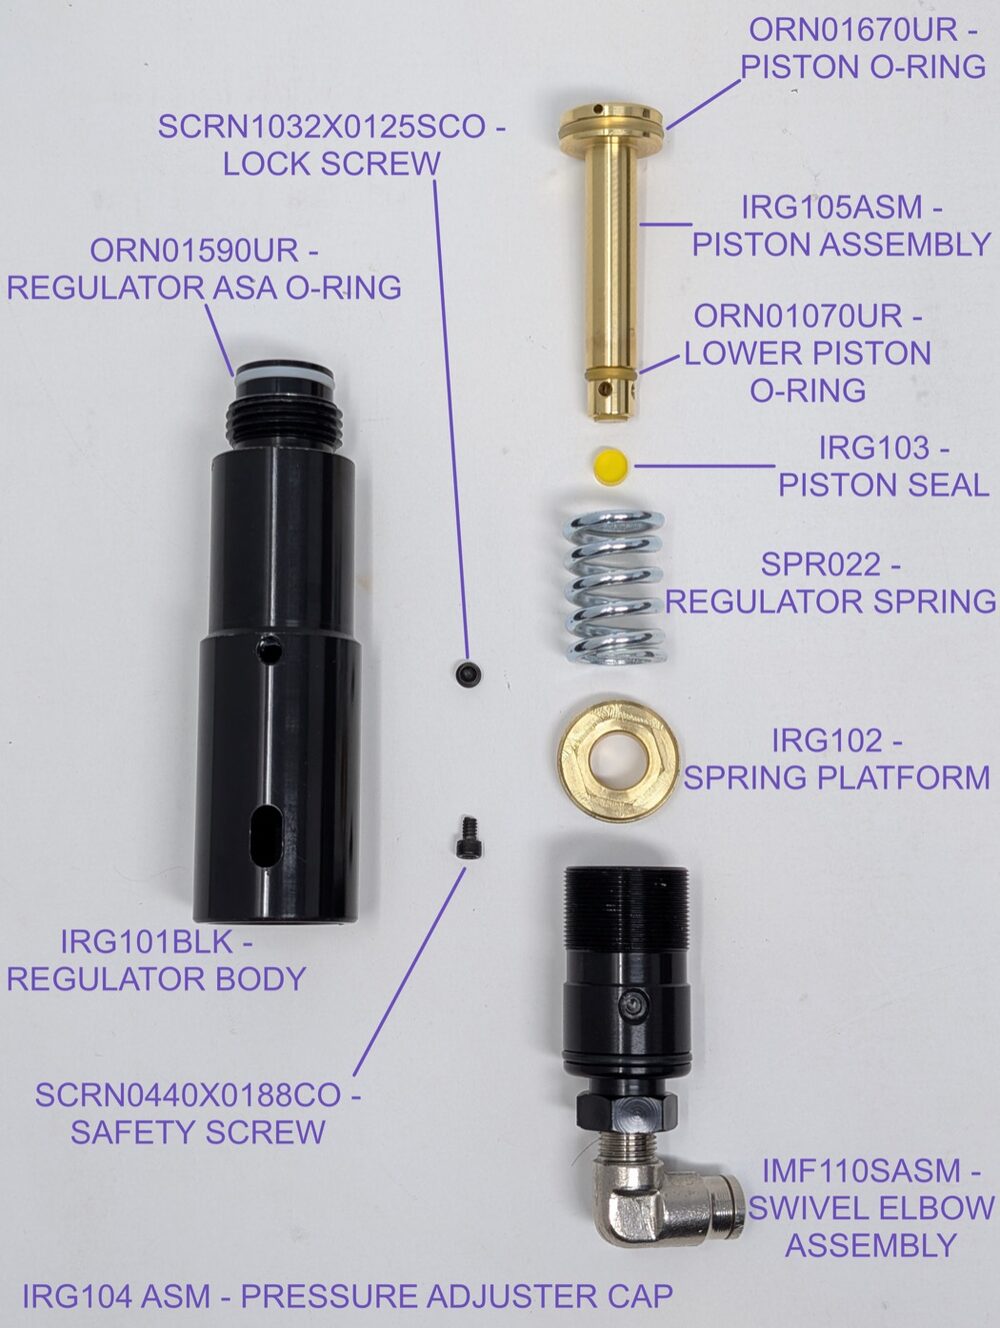
More than you want to tackle yourself? Check out the finished builds or get in touch to have your Ion serviced.