Ion 1.0 / Troubleshooting
Troubleshooting
Start with the symptom that matches what you're seeing. Most Ion problems trace back to one of a handful of usual suspects — it's rarely as mysterious as it feels mid-game.
Leaking
If you can hear or smell a leak but can't pin down where it's coming from, mix a few drops of dish soap into water and dab it along suspect fittings, seams, and o-ring seats with a cotton swab. Bubbles form right at the exact point air is escaping — much faster than trying to isolate it by ear or by feel alone.
Internally
- Pneumatic hoses loose, damaged, or not fully seated — replace with Ion-specific hoses only.
- A pneumatic banjo fitting leaking, even tightened correctly — check in this order, most likely first: the banjo's own seal (see specs page), then the microline itself — trim roughly 1mm off the hose end to restore its seal in the fitting, or replace the hose outright if there isn't enough length left to trim. A genuinely bad banjo fitting is rare; replace it only if neither of the above resolves the leak.
- Stripped screw holes are a separate failure class from worn o-rings — a stripped swivel-donut screw hole, body-breech screw hole, or vertical-adapter/banjo thread on the frame needs that part replaced outright, not resealed.
- Solenoid armature damaged or the marker overpressurized — a pressure spike (300+ psi) can permanently damage the solenoid's seals, sometimes called a "blown solenoid." Replace the armature and confirm operating pressure is under 200 psi; if it was overpressure-related, fix the regulator issue first or it'll happen again. A quick way to check the armature itself: it should fall freely under its own weight when removed and dropped — one that doesn't is worth a closer look.
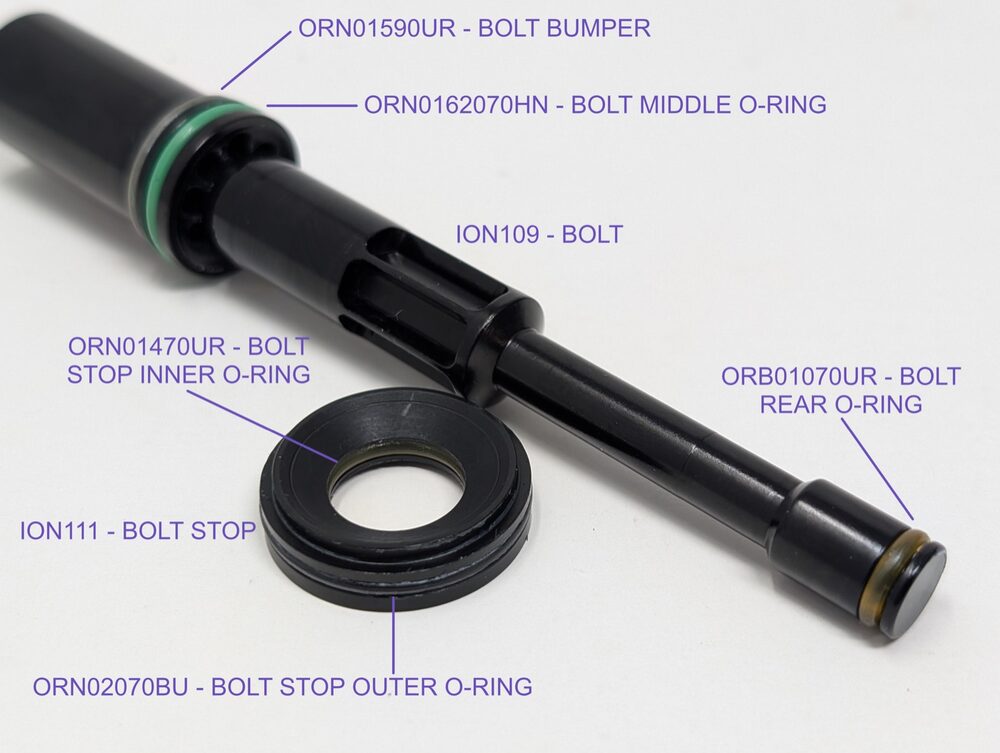
- Leaking down the barrel — one of the bolt o-rings or bolt stop o-rings is damaged. See Firing Assembly.
- Air leaking from the rear of the fire chamber, around the swivel donut — its two o-rings are worn or damaged. This one's under a snap ring and rarely needs attention otherwise; see Firing Assembly for removal.
Externally
- Macroline fitting venting — degas, reseat the hose fully into the fitting, and pull back gently to confirm it's caught and sealed. Replace the hose if this doesn't hold. The fitting itself is at the bottom of the regulator — see Regulator & ASA.
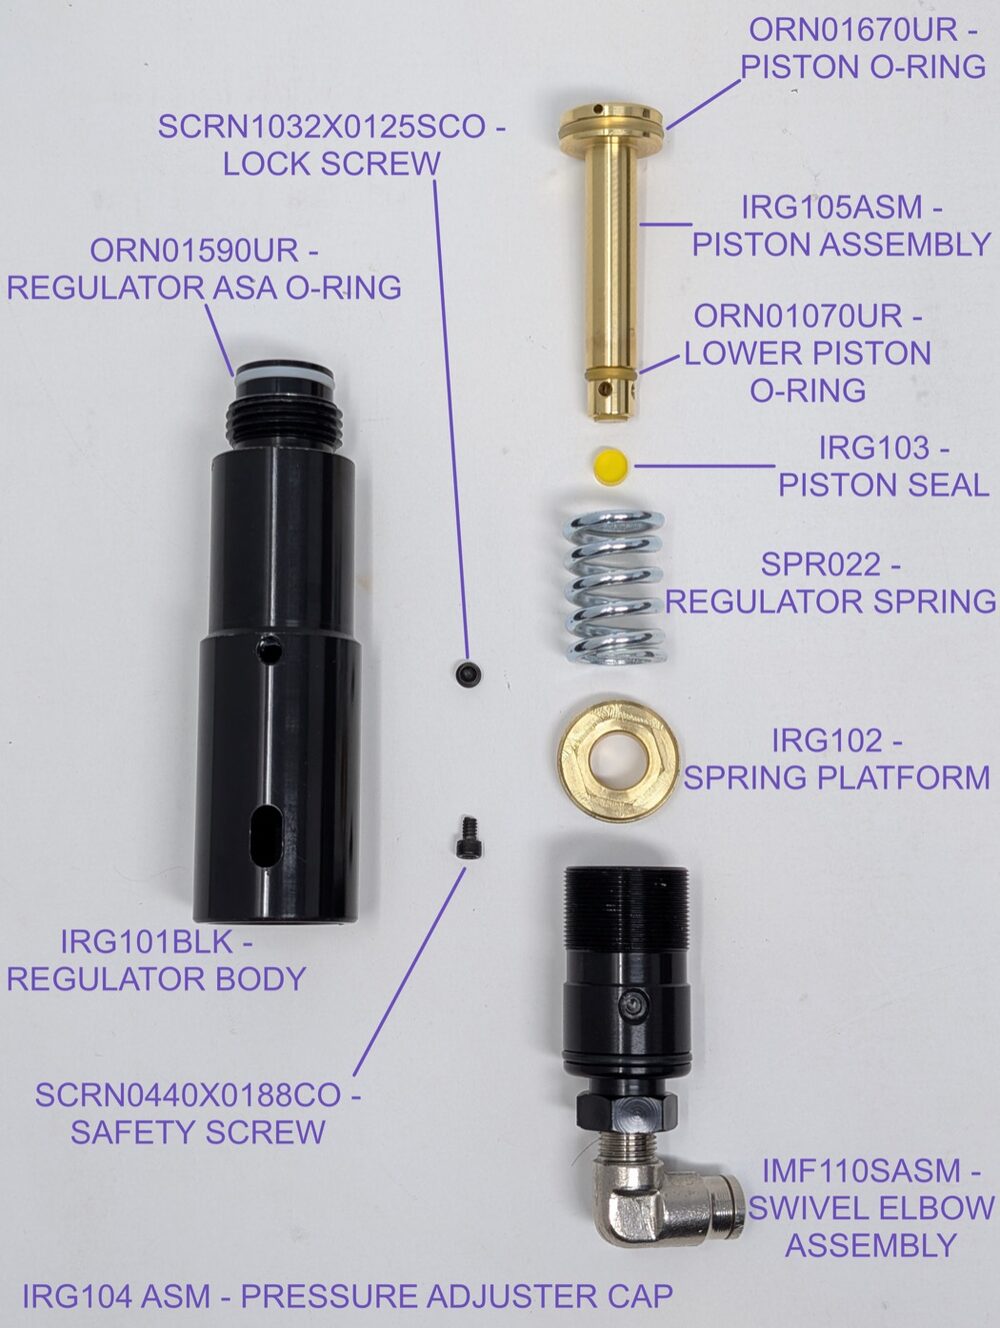
- Air around the regulator — the o-ring at the top of the regulator is likely damaged. See Regulator & ASA for the rebuild procedure.
- Regulator won't thread on fully — before assuming an o-ring problem, check that the body filter is seated flat in its port; a cocked filter is a more common culprit than a bad seal.
- Regulator seat contaminated or damaged — replace it (a used seat can be flipped and reused once before full replacement).
- Gauge leaking at its threads — reapply thread locker or PTFE tape. A gauge that's physically damaged or blown needs replacing outright, not resealing.
Electronics
Marker won't turn on
- Replace the battery.
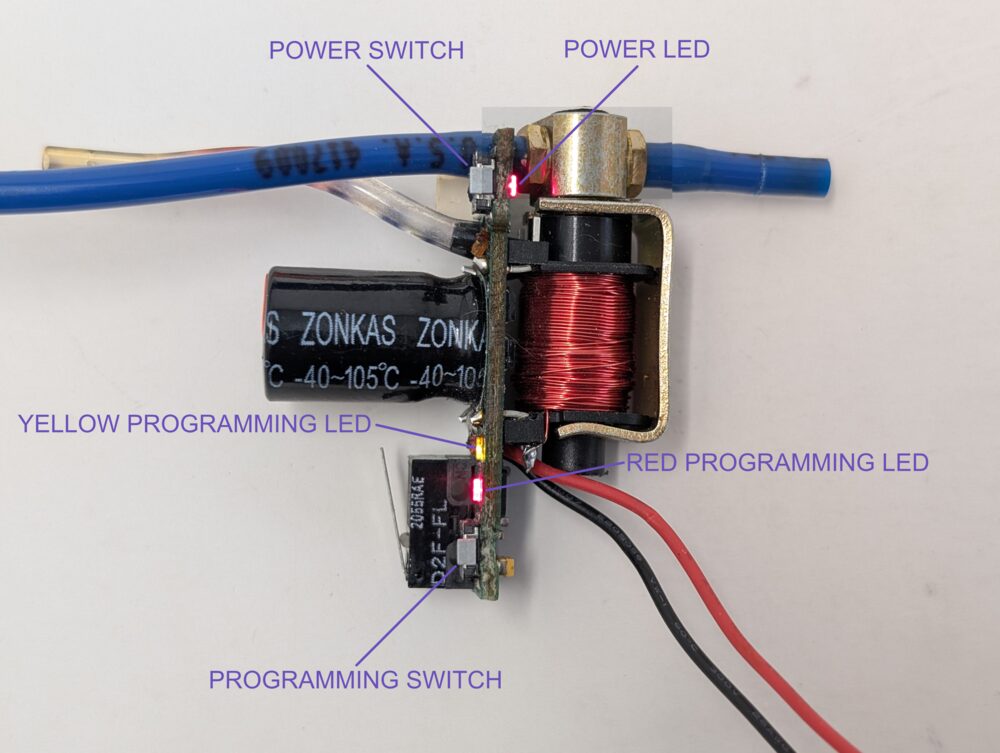
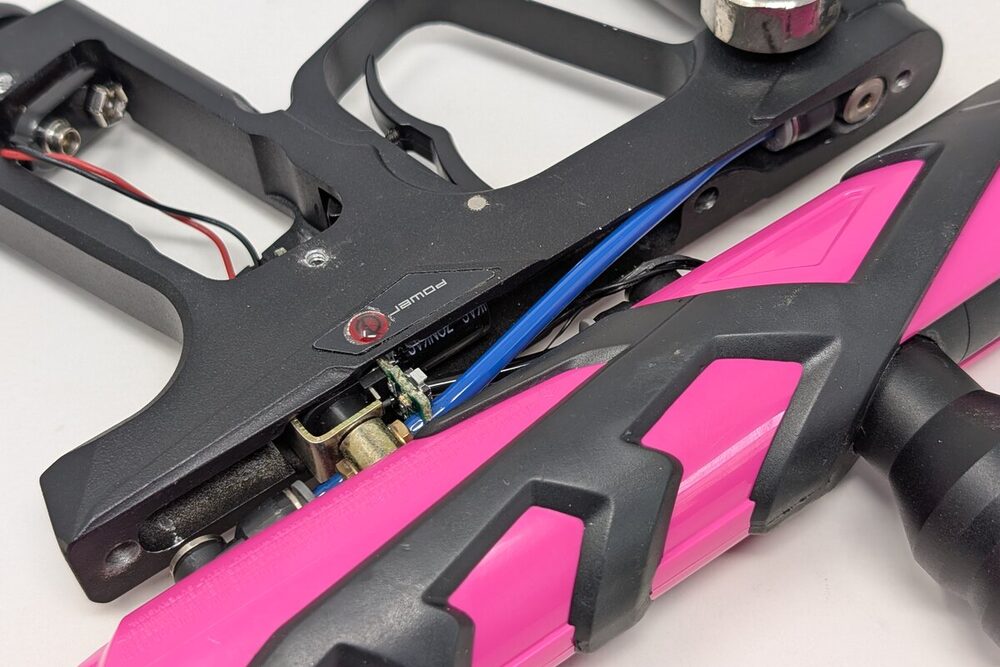
- Check the power switch. Separate the frame from the body and look at the board — the power switch (top-right) should look identical to the programming switch (bottom-right). The small raised button breaking off, or the switch's metal cover coming loose, are both common and visually obvious once you're looking at it. If only the button or cover is gone and the solder pads underneath are intact, a replacement switch (ITT/Cannon KSS321G) can be soldered in; if the whole switch tore free and took a solder pad with it, the board needs full replacement instead.
- Check the main capacitor for damage. It sits close enough to the top-left grip screw (the same side as the power button) that an overlong screw there can reach it — stock screws with stock grips never do this, since the stock grip panel is thick enough to keep clear. The risk only shows up with a longer-than-stock screw, or a stock-length screw paired with a thinner aftermarket grip panel than stock.
- With the battery connected, try pushing the power switch directly with your finger. If the LED lights after about two seconds, you're just not pressing the external button firmly enough — reassemble and try again. If it still doesn't light, the board itself needs repair or replacement.
Can't enter programming mode
- Same power-switch check as above — the programming switch is the identical part, just at the opposite corner of the board.
- Inspect the board for visible damage or debris interfering with the circuit.
Solenoid doesn't fire when you pull the trigger
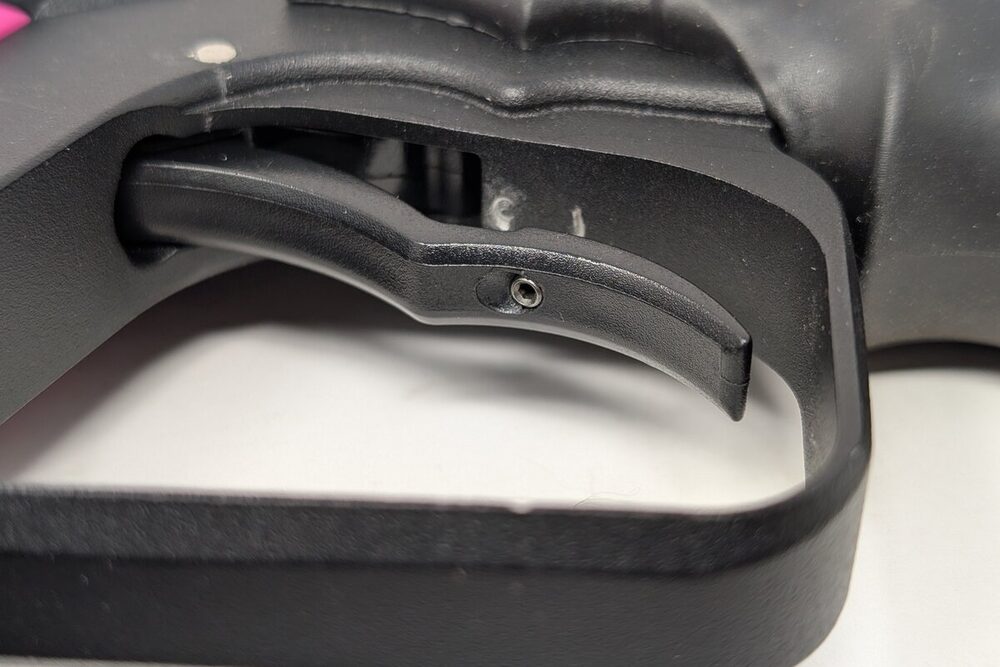
- If the LED doesn't blink each time you pull the trigger, the trigger microswitch isn't being actuated — check trigger adjustment first.
- Replace the battery — "dead" typically means down to 7–7.5 volts, at which point the board still turns on but the solenoid won't click.
- Confirm dwell is set to at least 12 (roughly 10ms) — too low and the solenoid effectively doesn't fire.
- Check the solenoid coil wire for damage where it connects to the silver pins on the board.
Board shuts off when the solenoid fires
- Replace the battery.
- Check the main capacitor for grip-screw damage, as above.
- Check the two silver prongs holding the solenoid to the board — if either is contacting other board components, this is the likely cause.
Marker turns itself on and off at will
The power switch is defective or bouncing and needs replacement.
Velocity dropoff during rapid fire
- Replace the battery.
- Increase dwell — try the stock setting first (52 on the stock board, 34ms on an aftermarket board). Running a QEV, dwell can typically drop to 16 or more.
- Clean and regrease the regulator — this is the most common cause.
- Clean and regrease the firing assembly and solenoid, avoiding over- or under-greasing either.
- A low-pressure tank can cause this on its own, separate from just running low — an LP tank's own internal regulator can struggle to flow air fast enough to keep up with sustained rapid fire, where an HP tank won't. Most tanks in use today are HP for other reasons, but LP tanks are still around.
First shot drop-off (FSDO)
- Replace the battery.
- Increase the dwell setting.
- Clean and regrease the firing assembly and solenoid — check both directions here, not just under-lubrication. Too much grease can cause bolt stick, which produces the same first-shot symptom as too little.
- If none of the above resolves it, this can be an electronics-level issue — replacing the board sometimes fixes it, though not guaranteed. Aftermarket boards with an ABS (anti-stiction) setting can also compensate the first shot's dwell directly.
Inconsistent velocity or shooting down
- Barrel bore mismatched to your paint — adjust bore or paint quality.
- Air source running low, or tank not fully seated.
- Battery low — replace with a fresh, high-quality 9V.
- Regulator seat contaminated or damaged.
- Regulator body filter screen clogged from a dirty or contaminated air fill, restricting flow — remove the vertical regulator and clean the screen.
- SFT o-ring damaged, swollen, or missing (17/90) — see specs page.
- Liquid CO2 entering the regulator — switching to HPA sidesteps this entirely; see the CO2 note below.
- A low-pressure tank struggling to keep up with rapid fire produces the same symptom — see the note under Velocity dropoff above.
Marker turns on but won't fire
- Battery low or dead.
- Solenoid clogged — disassemble, clean, and reassemble without lubricant. See Electronics.
- Trigger set screws adjusted too far in, holding constant pressure on the switch. See Trigger & Grip Frame.
- Trigger switch itself damaged — this is a board-level repair, not user-serviceable.
- Regulator pressure too high (above 300 psi) — lower pressure and/or replace the regulator seat.
- A slow, repeating single blink on the power LED alongside a refusal to fire usually just means no ball is loaded — Vision is doing its job, not failing. Load a ball and it fires normally; see the blink patterns on the Electronics page.
Breaking paint
- Battery low.
- Ball detents worn.
- Barrel bore mismatched to paint.
- Dwell set too high — lower it in small increments, testing between each change. See Electronics.
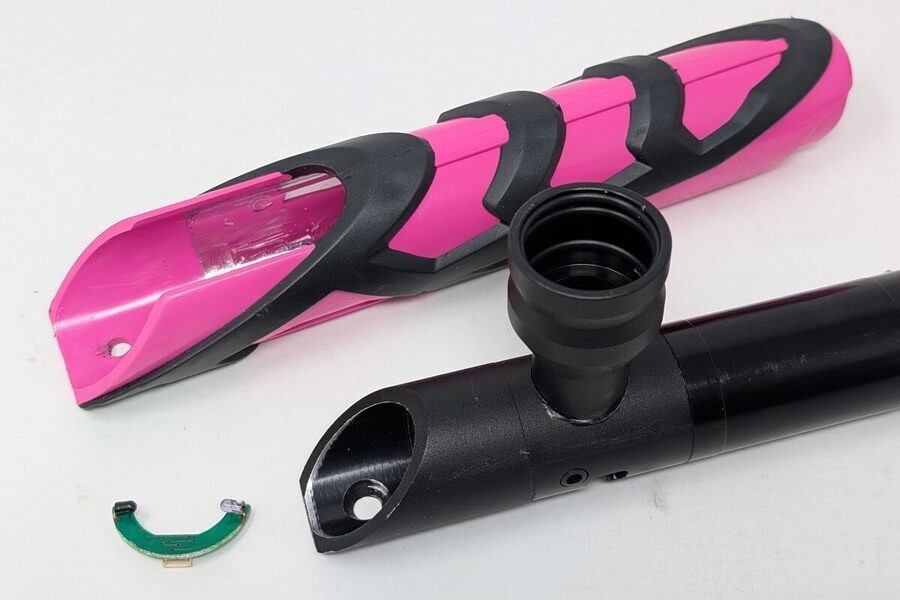
- Vision eyes off, or covered in paint/debris — clean the eyes and the slot they sit in. See Teardown.
- Eye wiring harness damaged from a misaligned install — the connector's prongs are offset, so it only seats one way; forcing it in backwards damages the socket. The wires can also get pinched or severed between the trigger frame and body if they're not routed carefully during reassembly. See Teardown.
- Eyes clean and Vision still misbehaving — some Ions have a reflective sticker inside the body cover that helps Vision read correctly; adding one is worth trying at this point, though plenty of Ions run fine without it as long as the eyes themselves are clean.
Regulator seized or overpressurizing
Internal seizure or pressure creep is usually wear or contamination on the adjustment threads, fixed with a clean and inspection during a rebuild — not by adding grease anywhere. If instead the regulator simply won't unscrew from the frame at all, that's a different problem with the opposite fix: see "Won't unscrew from the frame" on the Regulator & ASA page.
More than you want to tackle yourself? Check out the finished builds or get in touch to have your Ion serviced.